Post by DynoDave on Jul 16, 2017 11:04:46 GMT -5
With the recent changes at Photobucket, a LOT of forums now have a LOT of dead links to photos.
As a result, many of us are looking for a new photo host. May I suggest Flickr.com?
Compared to Photobucket, you will get:
- 1TB of free photo storage, Vs. 2gb on Photobucket.
- Very few ads, and they load and close (when requested) very quickly. Flickr will NOT bog down and lock-up your PC.
- Pretty intuitive to use.
- And it's FAST. Like I just upgraded from a 1998 vintage 386 to a new quad core machine fast. Like Model T Vs. Hellcat fast.
Below is a tutorial on the steps needed to use Flickr for your photo hosting.
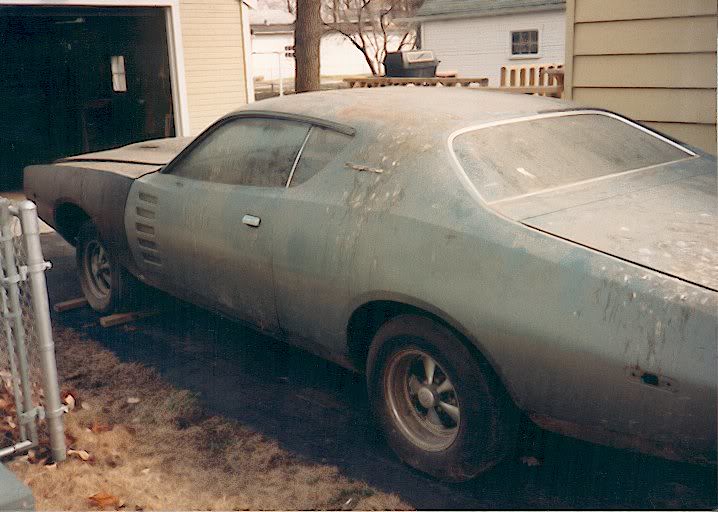
Step 1. You'll need to have your photos on your PC somewhere. If you have the originals, great. If they are ONLY on Photobucket, you will have to go there and download them to your PC.
Step 2. Navigate to Flickr.com. If you are a new user, register. If an existing user, sign in.
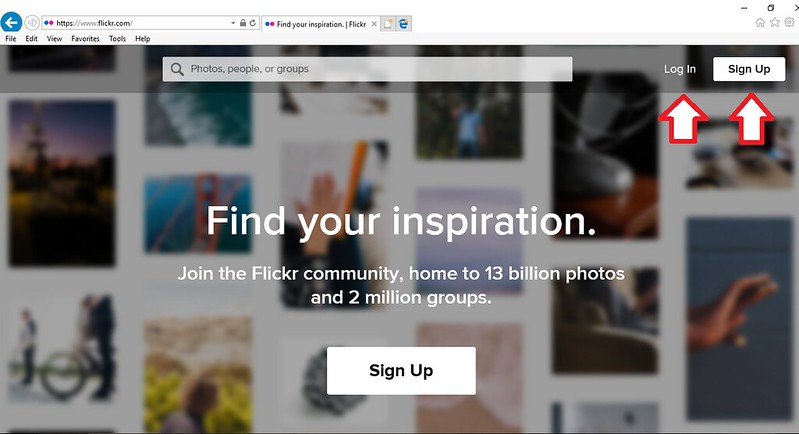
And you're in!
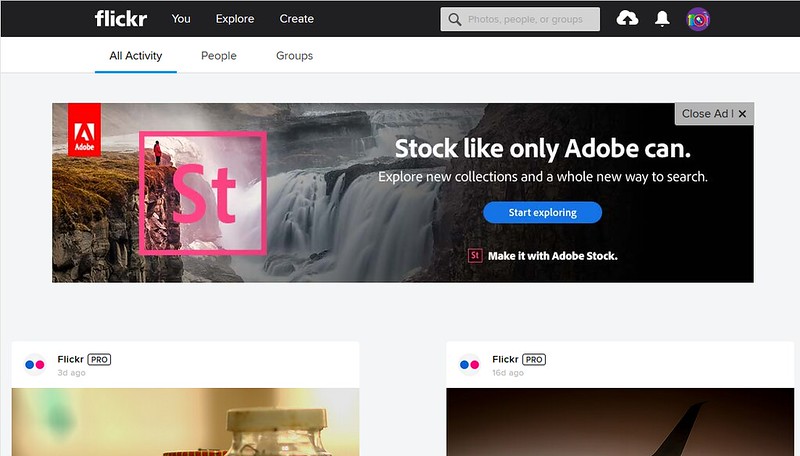
See that ad? Note that's singular, ad, not 8 pop-up ads like the old place. Click on the "close ad" box in the upper right corner of the ad if you'd like. Or leave it be. Your call.
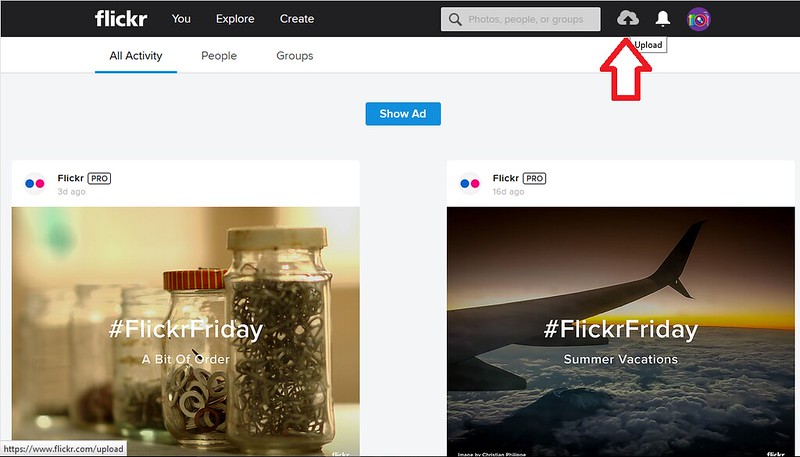
Step 3.
Click on this icon to begin uploading photos.
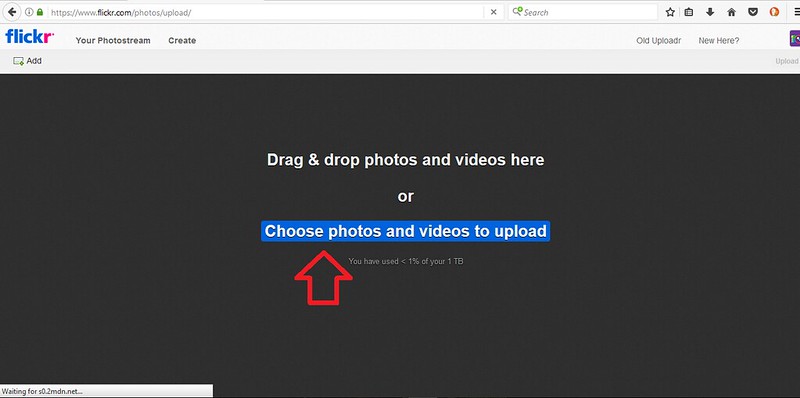
Step 4.
"Drag & Drop" or "Choose" the photos you want uploaded. I selected "Choose".
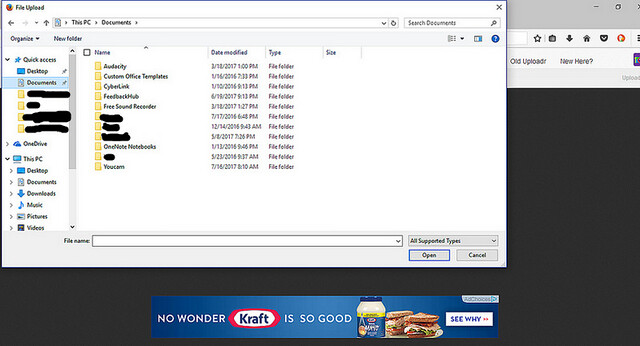
Step 5.
A window opens showing your PC drives and folders. Navigate to the folder where you saved your photos.
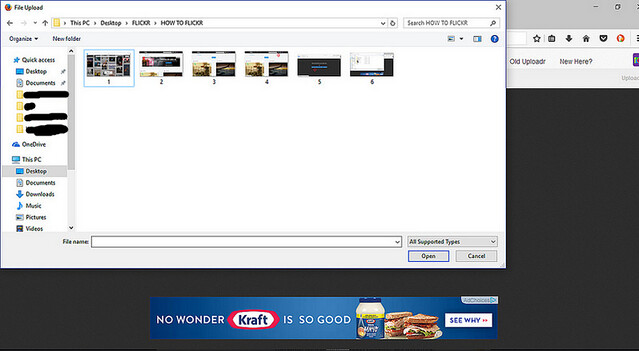
Step 6.
Select the photos from the folder that you wish to upload, and click "open" in the lower right corner of that window.
Step 7.
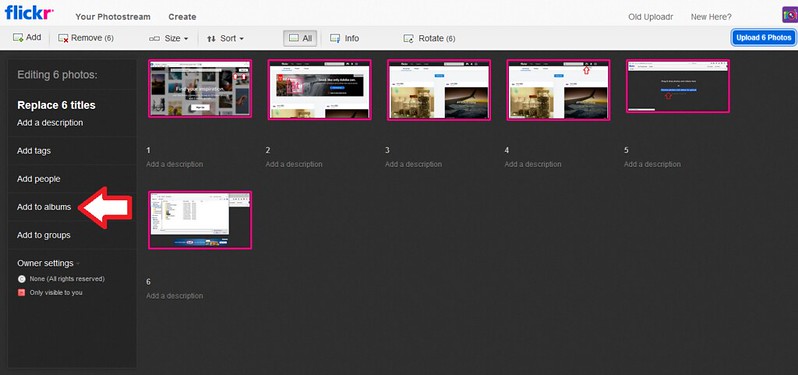
The photos are now uploaded to Flickr. Notice they are all highlighted in pink, which indicates they are all "selected". This page allows you to "Add tags", "Add people", "Add to albums" and "Add to groups" from the menu on the left hand side of the screen.
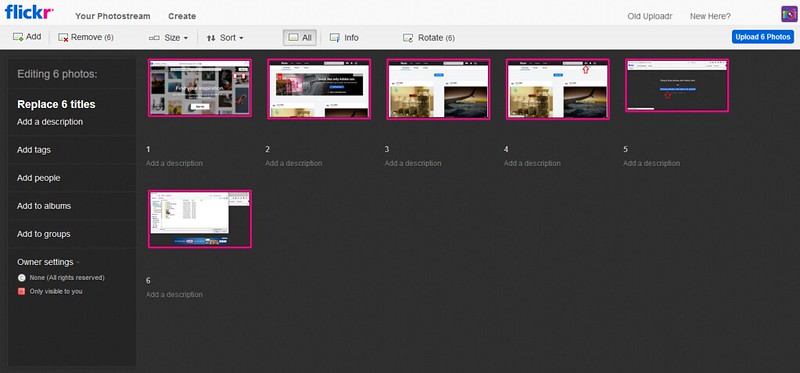
Step 8.
I like to group my images in albums by topic, so I selected "Add to album".
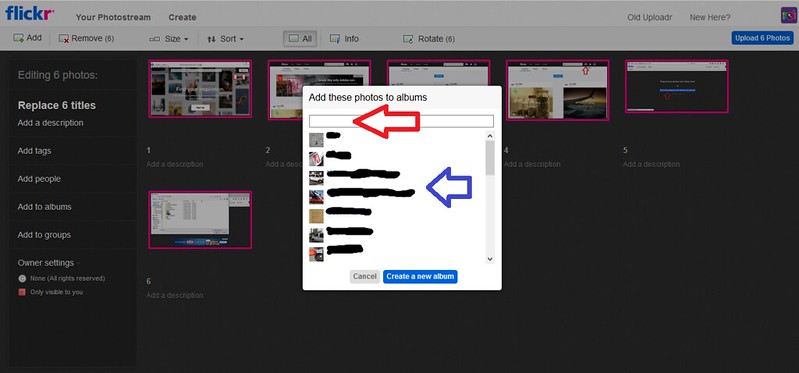
Step 9.
A new window opens. In this example, you can see I already have several albums created. You can select one of these (blue arrow), or create a new one (type a new album name in the text box, red arrow). I'm adding these to an existing album.
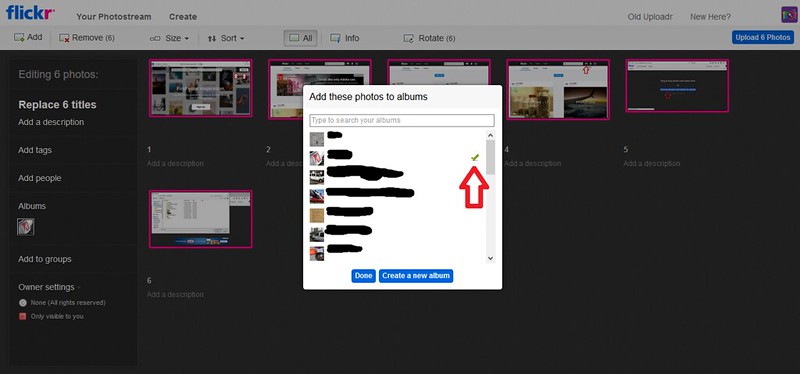
Step 10.
This window confirms the album you've selected with a small green check-mark. Select done.
Step 11.
A "+" appears next to "Album" in the menu on the left. To finish adding these photos to that album, click "upload photos" in the upper right corner of the page.
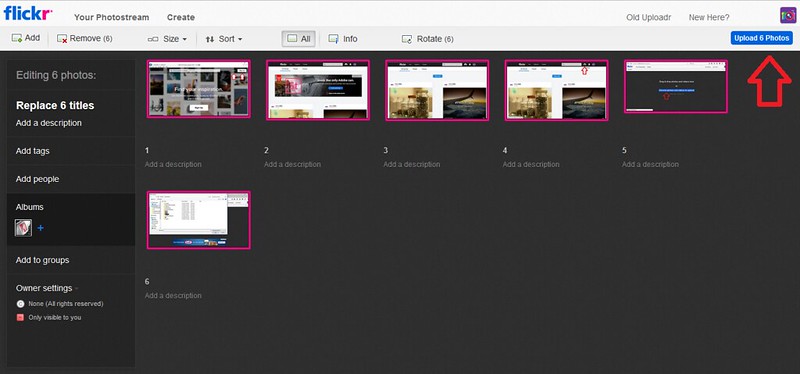
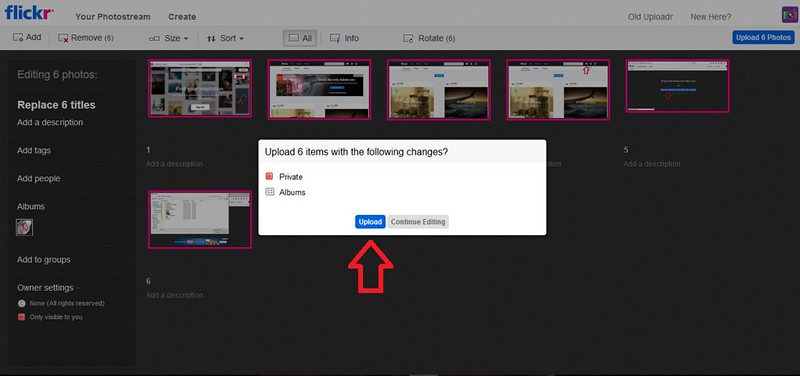
Step 12.
Confirm the action requested...upload.
Step 13.
It takes just a few seconds...

Step 14.
Then you are back here.
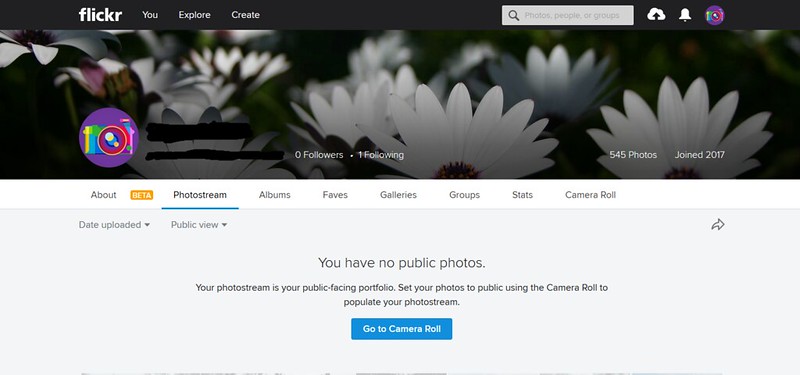
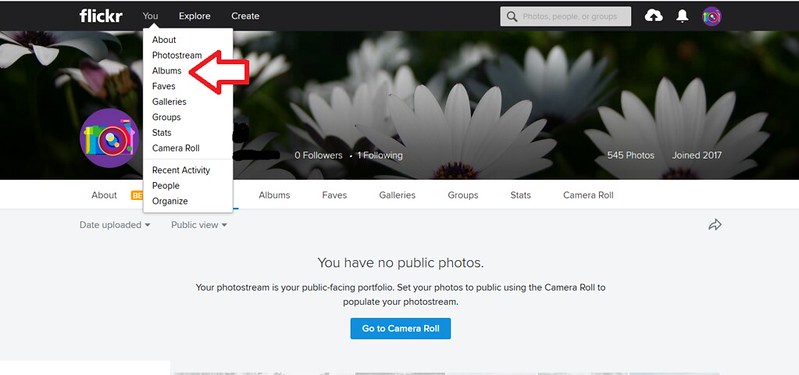
Step 15.
Now you want to see the album you just created. From the "You" menu, select "Albums".
Step 16.
Select the album you want to view.
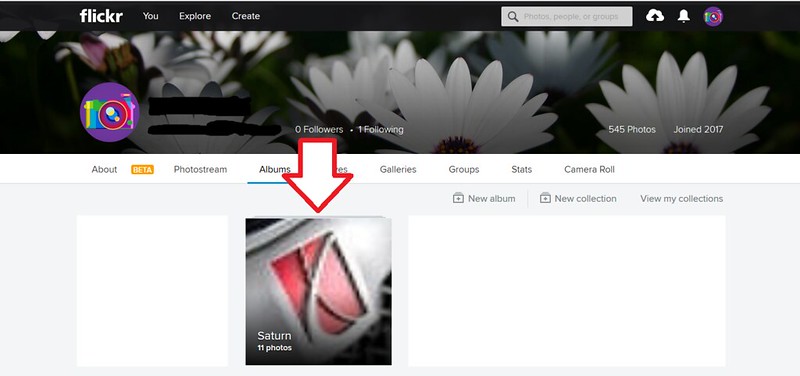
Step 17.
Select the image from the album that you would like to link to.

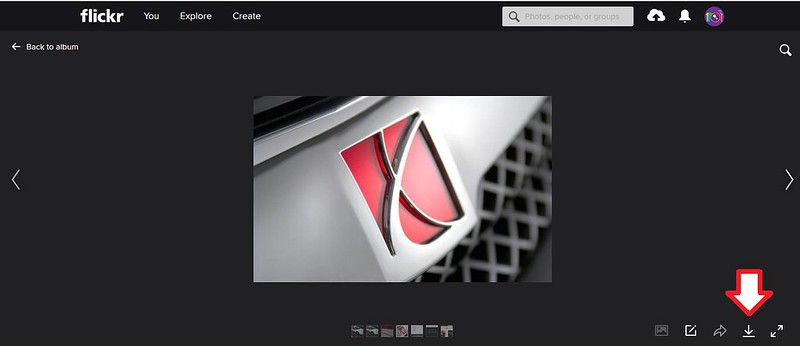
Step 18.
When the image opens, select this icon in the lower right corner.
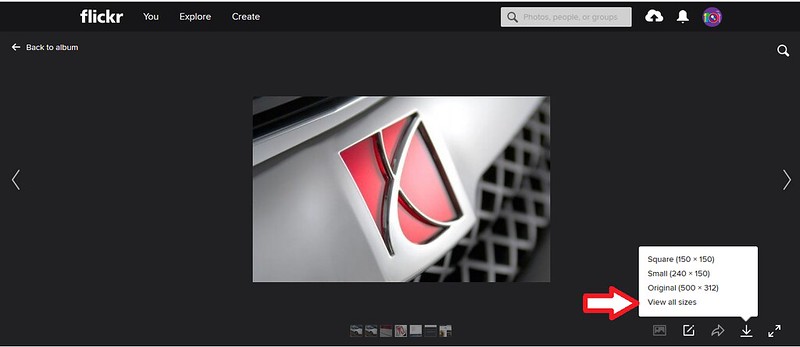
Step 19.
Select "View all sizes".
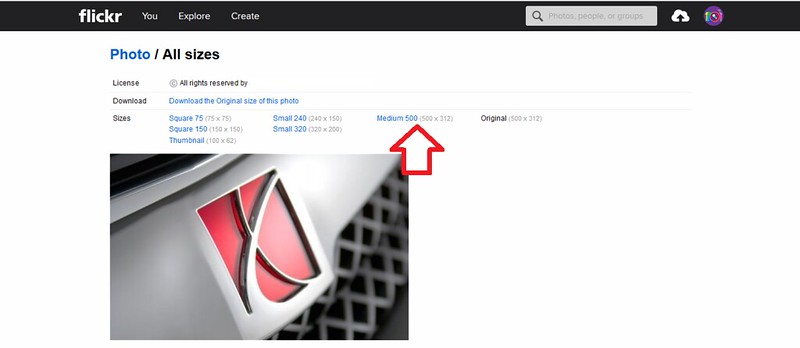
Step 20.
I've been selecting a Medium sized version of my photos.
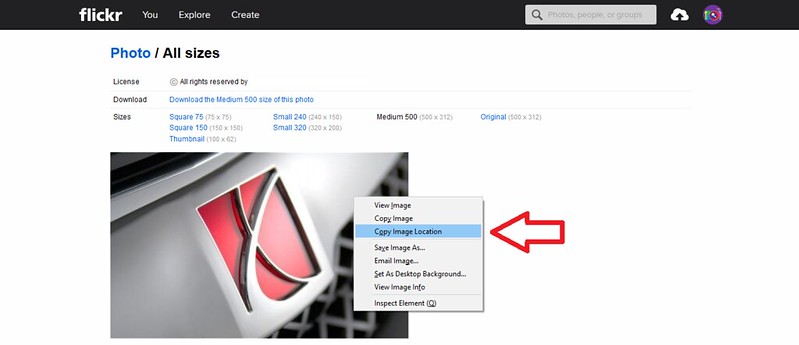
Step 21.
When the image size you selected appears, right click inside the photo, and select "Copy Image Location". The image address is now saved to your clipboard.
Step 22.
Post as any other hosted image.
As a result, many of us are looking for a new photo host. May I suggest Flickr.com?
Compared to Photobucket, you will get:
- 1TB of free photo storage, Vs. 2gb on Photobucket.
- Very few ads, and they load and close (when requested) very quickly. Flickr will NOT bog down and lock-up your PC.
- Pretty intuitive to use.
- And it's FAST. Like I just upgraded from a 1998 vintage 386 to a new quad core machine fast. Like Model T Vs. Hellcat fast.
Below is a tutorial on the steps needed to use Flickr for your photo hosting.
Step 1. You'll need to have your photos on your PC somewhere. If you have the originals, great. If they are ONLY on Photobucket, you will have to go there and download them to your PC.
Step 2. Navigate to Flickr.com. If you are a new user, register. If an existing user, sign in.
And you're in!
See that ad? Note that's singular, ad, not 8 pop-up ads like the old place. Click on the "close ad" box in the upper right corner of the ad if you'd like. Or leave it be. Your call.
Step 3.
Click on this icon to begin uploading photos.
Step 4.
"Drag & Drop" or "Choose" the photos you want uploaded. I selected "Choose".
Step 5.
A window opens showing your PC drives and folders. Navigate to the folder where you saved your photos.
Step 6.
Select the photos from the folder that you wish to upload, and click "open" in the lower right corner of that window.
Step 7.
The photos are now uploaded to Flickr. Notice they are all highlighted in pink, which indicates they are all "selected". This page allows you to "Add tags", "Add people", "Add to albums" and "Add to groups" from the menu on the left hand side of the screen.
Step 8.
I like to group my images in albums by topic, so I selected "Add to album".
Step 9.
A new window opens. In this example, you can see I already have several albums created. You can select one of these (blue arrow), or create a new one (type a new album name in the text box, red arrow). I'm adding these to an existing album.
Step 10.
This window confirms the album you've selected with a small green check-mark. Select done.
Step 11.
A "+" appears next to "Album" in the menu on the left. To finish adding these photos to that album, click "upload photos" in the upper right corner of the page.
Step 12.
Confirm the action requested...upload.
Step 13.
It takes just a few seconds...
Step 14.
Then you are back here.
Step 15.
Now you want to see the album you just created. From the "You" menu, select "Albums".
Step 16.
Select the album you want to view.
Step 17.
Select the image from the album that you would like to link to.
Step 18.
When the image opens, select this icon in the lower right corner.
Step 19.
Select "View all sizes".
Step 20.
I've been selecting a Medium sized version of my photos.
Step 21.
When the image size you selected appears, right click inside the photo, and select "Copy Image Location". The image address is now saved to your clipboard.
Step 22.
Post as any other hosted image.